I worked on the camper the last two weekends.
And, currently, I am desperately wishing that the space bar on this darn laptop was not sticking.
Anyhoo.
This is the furniture that came with the kit. I assembled, glued, painted, and upholstered the chairs. I assembled the table, used scrapbook paper for the top, and mod-podged it many times. I used a metallic silver marker for the legs and rim. It's not quite as 3-dimensional as I'd hoped. I will try to find metallic silver puff paint. I do like the way the mod podge came out.
In the above picture, on the left you can see the glued but not yet painted jacks for under the trailer.
A front view of the set.
This is the front panel. I am not going to open the take-out window, so I wood-puttied it. I'll sand it this weekend. I also wood-puttied the edges of all the window trims. I am now seemingly obsessed with wood putty.
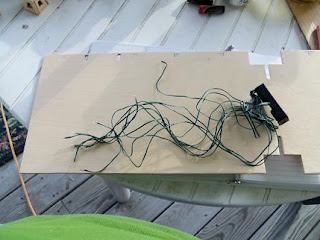
These are the lights I'll be using. There's 10 bulbs, each on its own wire, attached to a battery holder that takes 2 AA batteries. Since this is a raffle project (and since I have very little financing for this project), this light set is the most affordable option. We are currently thinking how to make shades/globes/fixtures out of each bulb. The other point is, the wires are all long enough so that I can install lights at both ends of the camper. And the firepit.
I will need to drill out holes to slip the lights through - I'll set the battery holder under the camper, maybe disguised by a piece of furniture or landscaping.
If you look closely, on the piece of floor (under the battery/lights thing) I've marked where I need to drill.
This, however, was the best miniature project I worked on last weekend:
If you look very closely, you'll spot a tiny but wonderful almost-two-year-old grandbaby.


No comments:
Post a Comment